ScanEZ Cloud Portal Customers.
In this section, we will discuss customers.
This section contains three sub-sections-
Customers.
Locations.
Areas.

Customers: In this section we discuss customers.

Below points will explain the above screenshot.
Here we can see the title of the page.
From here we can search customers by customer name and tags.
From this button, we can search.
From this button, we can reset the filter.
We can list all the machines which are active and inactive.
We can list all the active machines.
We can list all the inactive machines.
We can see a list of all the customers by customer name.
We can see a list of the status of the machine.
We can see a list of the tags of the machine.
We can see a list of actions.
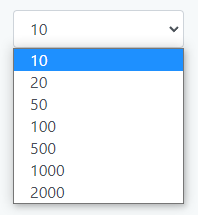
This dropdown allows us to display the number of devices on the current page i.e. the number of devices we want to see on a single page.

13. From this button, we can add customers.

Below points will explain the above screenshot.
Here we can see the title of the page.
Here we have to add the customer name.
Here we have to add tags.
From this button, we can add customers.
From this button, we can cancel adding customers and we will go back to the previous page.
2. Locations

Below points will explain the above screenshot.
Here we can see the title of the page.
From here we can search customers by locations and tags.
From this button, we can search.
From this button, we can reset the filter.
We can list all the machines which are active and inactive.
We can list all the active machines.
We can list all the inactive machines.
We can see a list of all the locations here.
We can see a list of customer names.
We can see a list of tags.
We can see a list of actions.
This dropdown allows us to display the number of devices on the current page i.e. the number of devices we want to see on a single page.

13. From this button, we can add locations.

Below points will explain the above screenshot.
Here we can see the title of the page.
From this dropdown, we can select the customer name.
Here we have to add the location name.
Here we have to add tags.
From this button, we can add a new location.
From this button, we can cancel adding a new location and we will go back to the previous page.
3. Areas

Below points will explain the above screenshot.
Here we can see the title of the page.
From here we can search by area name and tags.
From this button, we can search.
From this button, we can reset the filter.
We can list all the machines which are active and inactive.
We can list all the active machines.
We can list all the inactive machines.
We can see a list of area names.
We can see a list of types of devices.
We can see a list of tags.
From here we can edit any area using the following tools.
From this button, we can add a new area.

Below points will explain the above screenshot.
Here we can see the title of the page.
Here we have to add the area name.
Here we have to add the area type.

4. Here we have to add hours.
5. Here we have to add a holiday.
6. Here we have to add tags.
7. From this dropdown, we can add the customer name.
8. From this dropdown, we have to select the location name.
9. From this dropdown, we have to select the machine name.
10. Using this button, we can add a new area.
11. We can cancel adding new area and we will go back to previous page.
