ScanEZ Cloud Portal Devices.
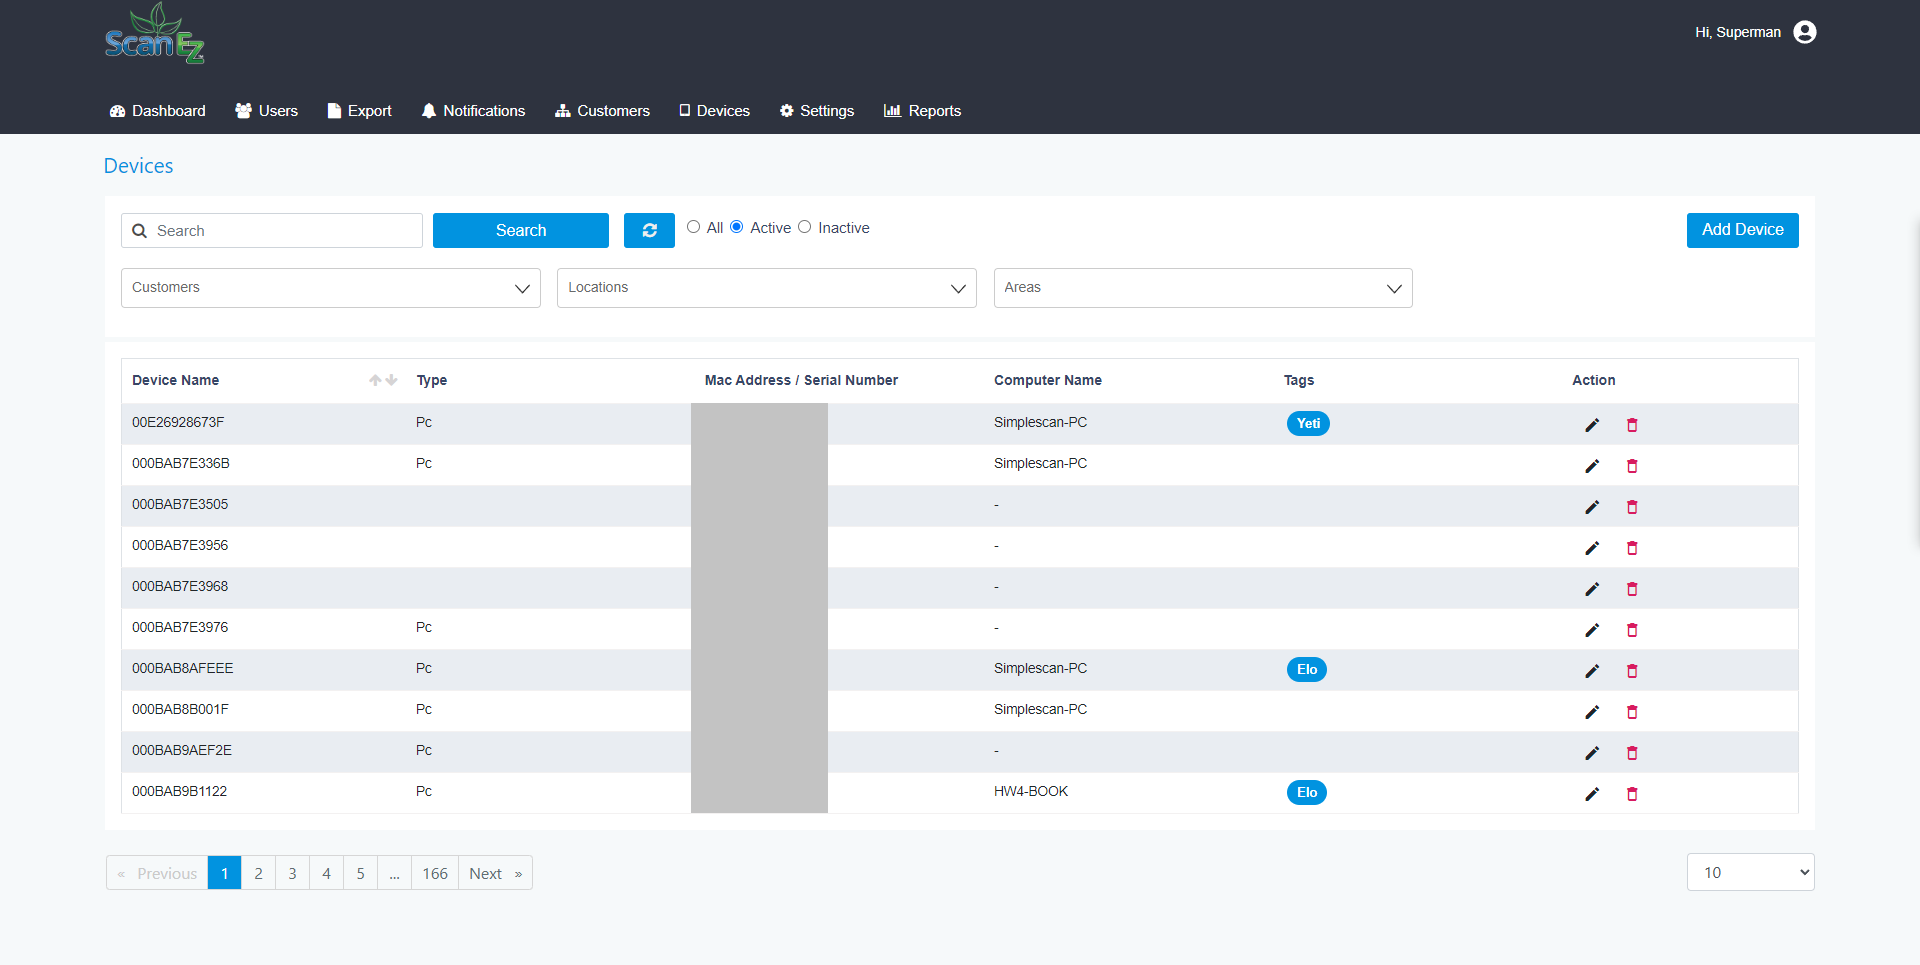
The Devices page will show you a list of all devices.
Below is the screenshot of the Devices page.
In Devices, there are 4 options:
Devices.
Machines.
Schedule events.
Machine configuration.
Devices: “Devices” refer to actual physical hardware.

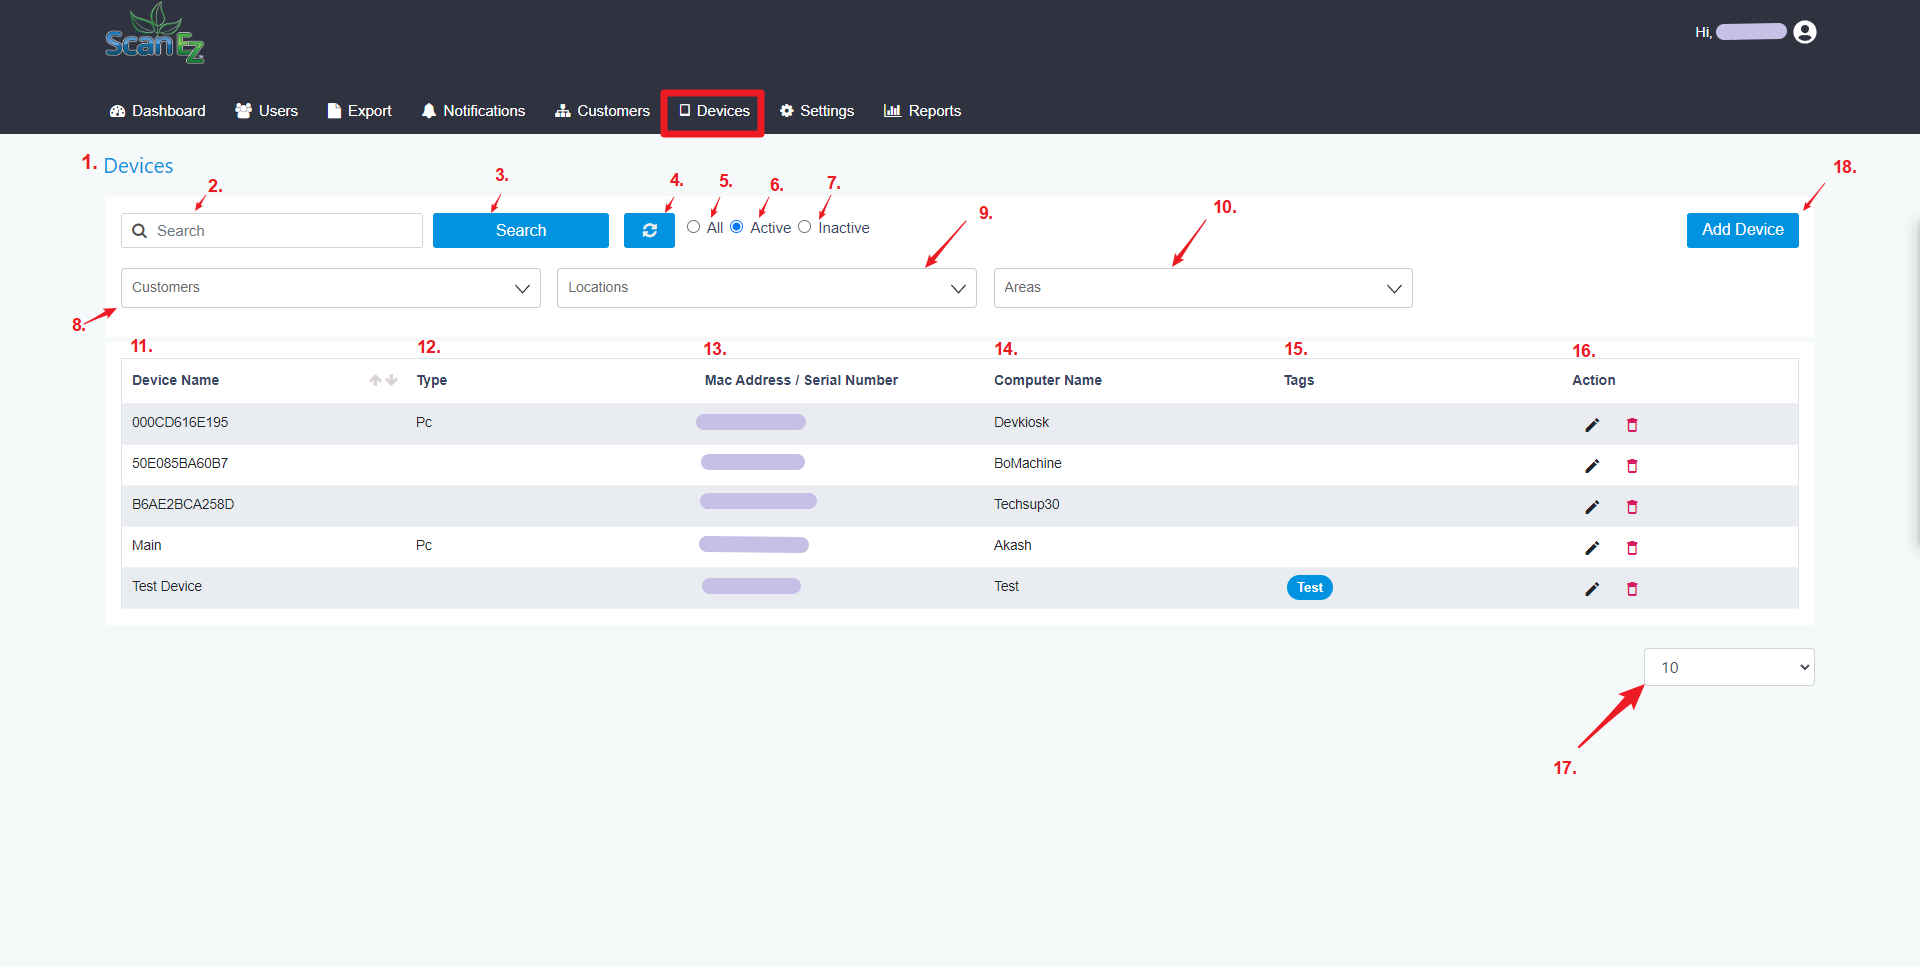
Below points will explain the above screenshot.
This point shows the title of the page.
We can use the search field to look up a device. We can search by either device name, tags, or computer name. Note you cannot search by MAC, Serial number, or computer name.
On clicking the “search button” we can search our device whose detail we filled in the no. 2 text box.
Note the Refresh button does not refresh the search results, instead, it clears the Search field or we can say it resets the search result and we get our default page.
By selecting this checkbox, we can see all the active and inactive devices.
By selecting this checkbox, we can see all the active devices only, also by default this checkbox is selected.
By selecting this checkbox, we can see all the inactive devices only.
By this dropdown, we can search all the devices by the customer's name.
We can search all the devices by Location’s name by this dropdown.
We can search all the devices by Area’s name by this dropdown.
We can see a list of all the devices by their name.
We can see a list of all the types of devices.
We can see a list of MAC addresses/Serial numbers.
We can see a list of Computer names.
We can see a list of tags.
We can see a list of all the actions we can perform on any device i.e we can either delete that device or we can edit that device.
This dropdown allows us to display the number of devices on the current page i.e. the number of devices we want to see on a single page.
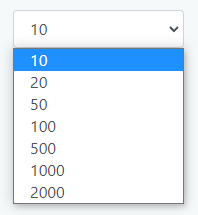
18. We can add a new device by using this button.
Adding a new device

We have to enter the name of the device
Here we have to select what we want to add either PC or a Scanner.
We have to add tags here.
Here we have to enter the MAC address of our device.
Here we have to enter the Serial number of our device.
Here we have to enter the Computer's name.
By clicking on this “ADD” button we can add the device.
By clicking on this “CANCEL” button we can go back to the Device page without adding the new device.
Machines: On this page, we find all the machine details. We can also add new machines here.

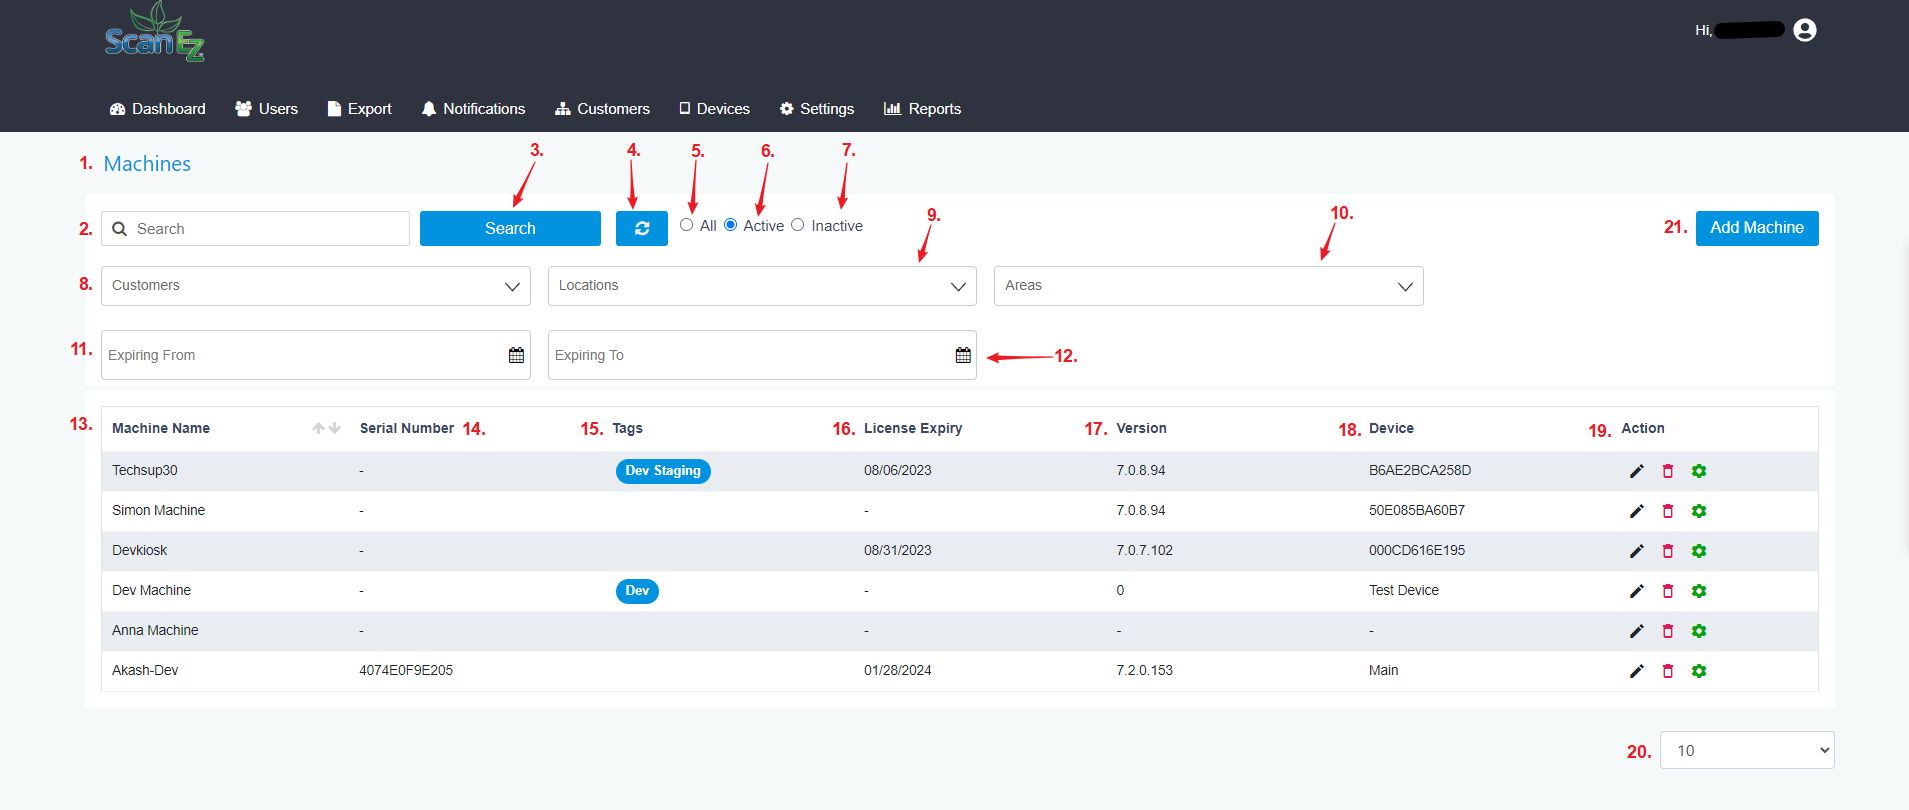
Below points will explain the above screenshot.
This point shows the title of the page.
We can use the search field to look up a machine. We can search by either device name, tags, MAC, Serial number, or computer name.
On clicking the “search button” we can search our machine whose detail we filled in the no. 2 text box.
Note the Refresh button does not refresh the search results, instead, it clears the Search field or we can say it resets the search result and we get our default page.
By selecting this checkbox, we can see all the active and inactive machines.
By selecting this checkbox, we can see all the active machine only, also by default this checkbox is selected.
By selecting this checkbox, we can see all the inactive machine only.
By this dropdown, we can search all the machines by the customer's name.
We can search all the machines by Location’s name by this dropdown.
We can search all the machines by Area’s name by this dropdown.
Here we have to add “Expiring from” date.
Here we have to add “Expiring to” date.
We can see a list of all the machines by their name.
We can see a list of all the serial numbers of machine.
We can see a list of all the tags.
We can see a list of all the licence expiry date.
We can see a list of all the versions which is installed in that machine.
We can see a list of all the Device name with which the machine is associated.
We can see a list of all the actions we can perform on any machine i.e we can either delete that machine or we can edit that machine.
This dropdown allows us to display the number of devices on the current page i.e. the number of devices we want to see on a single page.

21. We can add new machine by using this button.

Below points will explain the above screenshot.
This point will show the title of the page.
Here we have to enter machine name.
Here we have to enter serial number of machine which we want to add.
Here we have to enter machine tag.
In this dropdown, we have to choose customer name whom we want to assign new machine.
In this dropdown, we have to choose location name where we want to assign new machine.
In this dropdown, we have to choose area name where we want to assign new machine.
In this dropdown, we have to choose device name to which we want to assign new machine.
By using this button, we can add our new machine.
By using this button, we can cancel adding new machine and we will go back to previous page.
Scheduled Events : Here we can schedule events like software update, licence manager and machine configuration.

This point will show the title of the page.
In this dropdown, we can select the feature for which we want to see scheduled event.
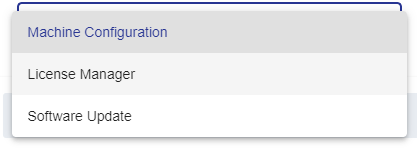
a. Machine configuration : In this page we can see all the machine configuration events which were scheduled.

3. Here we can see the list of all the customer name who have scheduled any event.
4. Here we can see the list of all the machine which were scheduled.
5. Here we can see the list of date on which all the events were created.
6. Here we can see the list of date for which events were scheduled.
7. Here we can see the list of success and failed status.
8. From here we can jump to next page.
b. Licence Manager : In this page we can see all the licence management events which were scheduled.
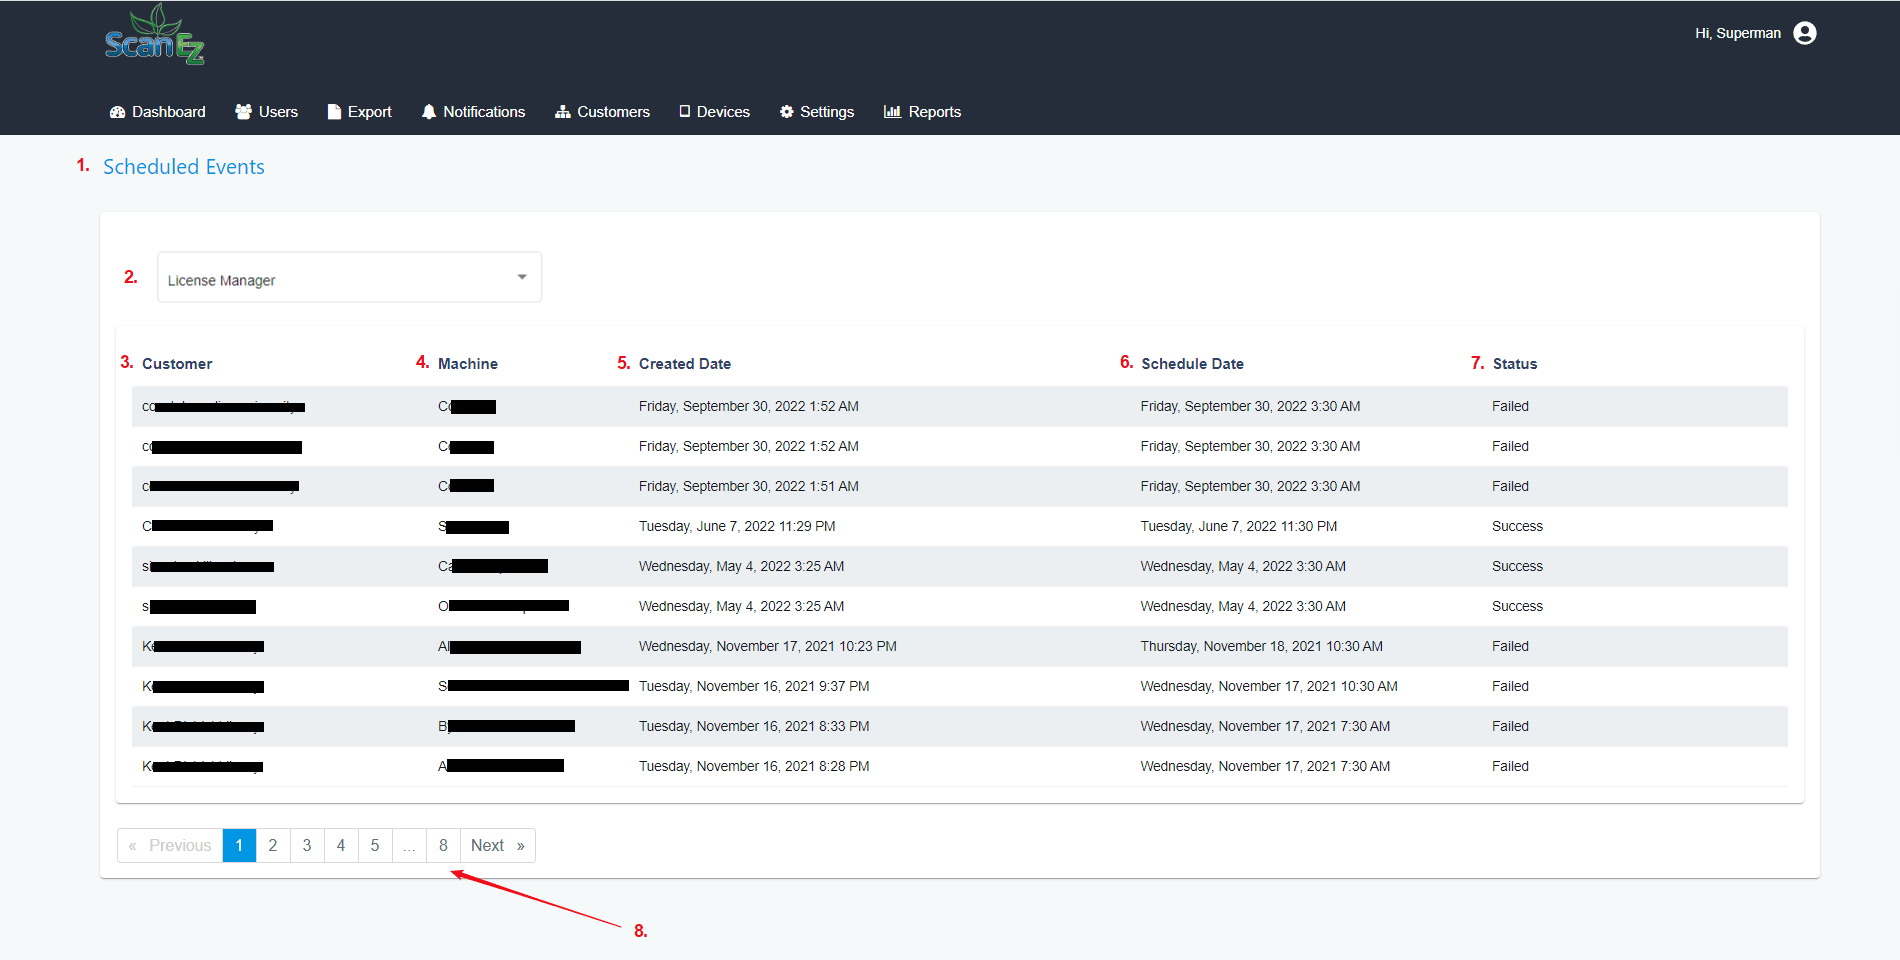
3. Here we can see the list of all the customer name who have scheduled any event.
4. Here we can see the list of all the machine which were scheduled.
5. Here we can see the list of date on which all the events were created.
6. Here we can see the list of date for which events were scheduled.
7. Here we can see the list of success and failed status.
8. From here we can jump to next page.
c. Software update : In this page we can see all the software update events which were scheduled.

3. Here we can see the list of all the customers who have scheduled any event.
4. Here we can see the list of all the machines which were scheduled.
5. Here we can see the dates on which all the events were created.
6. Here we can see the list of dates for which events were scheduled.
7. Here we can see the list of success and failure statuses.
8. From here we can jump to the next page.
Machine configuration: Here we configure all the settings of our machine.
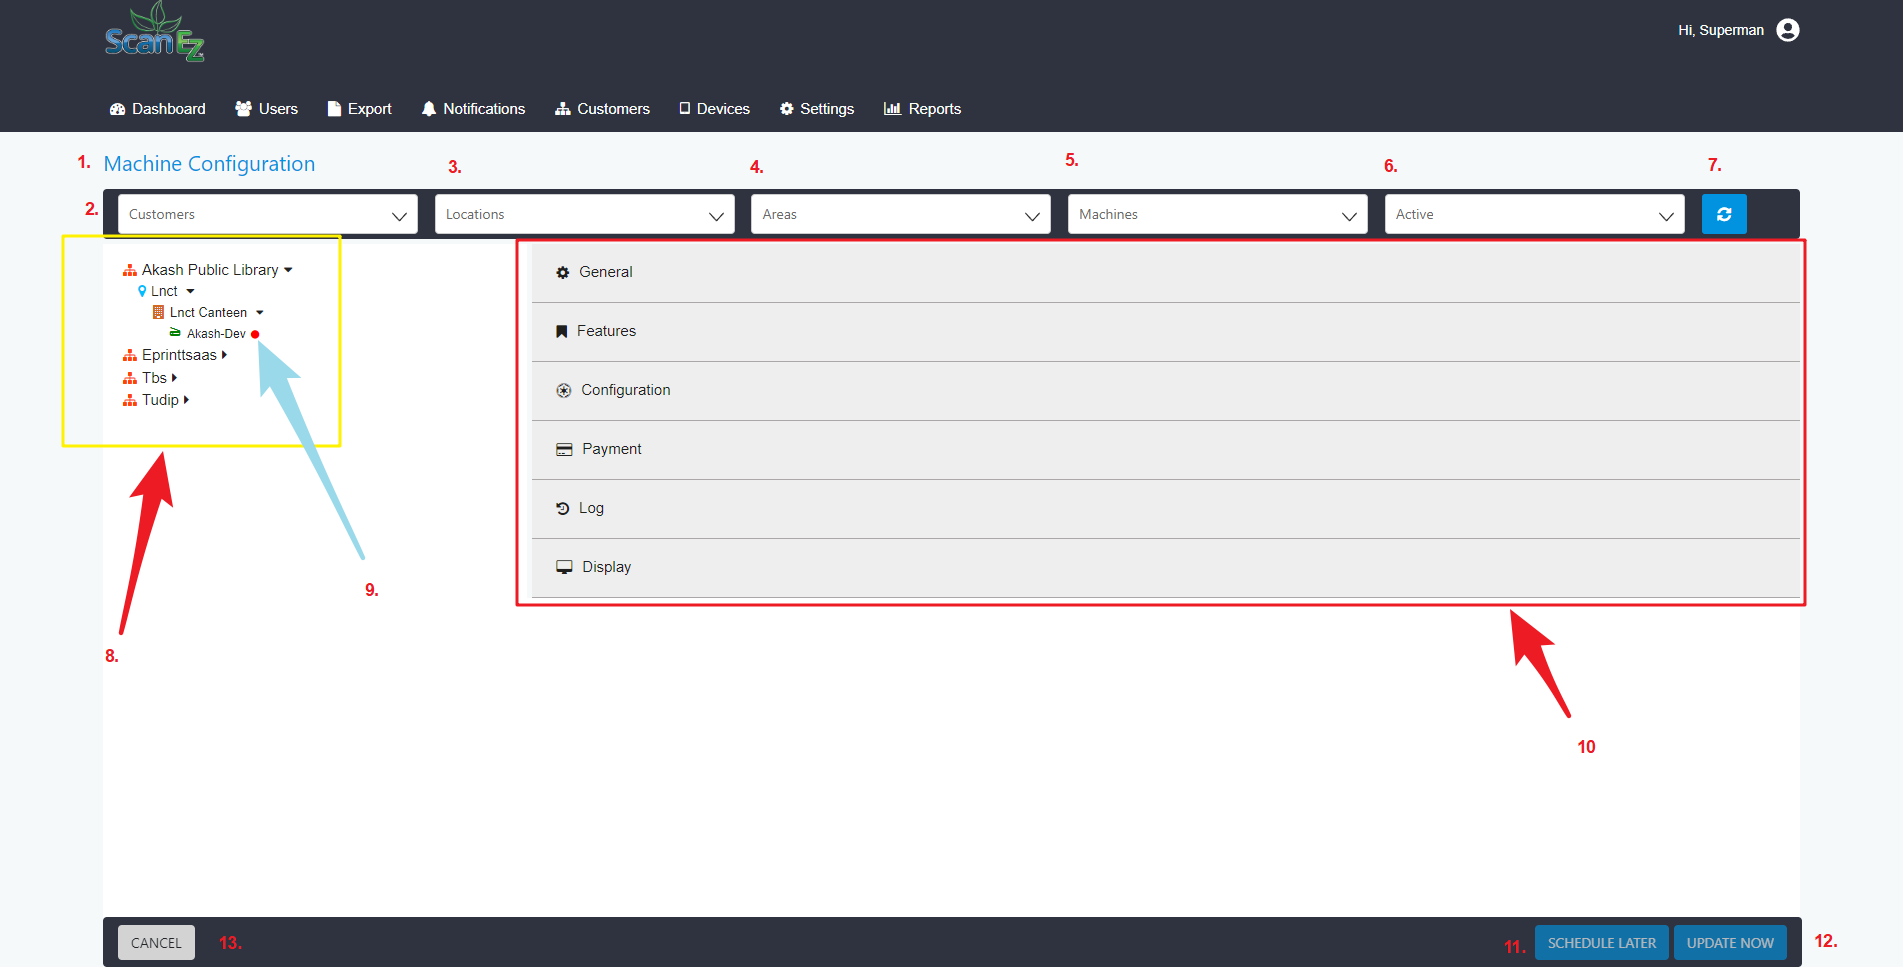
Below points will explain the above screenshot.
This point will show the title of the page.
From this dropdown, we can search our machine by customer name.
From this dropdown, we can search our machine by location.
From this dropdown, we can search our machine by area.
From this dropdown, we can search our machine by machine.
From this dropdown, we can search our machine by their availability i.e. either machine is active, inactive or all machines.
From this button, we can clear all the filters.
We can see the hierarchy of all the machines. This hierarchy is as follows:-
Customer name.
Location name.
Area name.
Machine name.
Here we can see our machine status.
The machine is offline if the red flag is visible.
The machine is online if the green flag is visible.
From here we can configure our selected machine. We will discuss this configuration on the next page.
From this button, we can schedule an event for machine configuration.
From this button, we can update our machine immediately.
From this button, we can cancel the update and we will go back to the previous page.
