ScanEZ Cloud Portal Settings.
In this section, we will see all the settings of various subsections.
This section contains 5 subsections which are as follows-
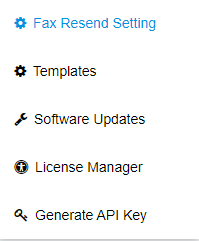
Fax Resending Setting: Here we can configure the fax resending setting.

Below points will explain the above screenshot.
Here we can see the title of the page.
From here we can search for customers by customer name.
From this button, we can search.
From this button, we can reset the filter.
We can list all the machines which are active and inactive.
We can list all the active machines.
We can list all the inactive machines.
We can see a list of all customer names.
Here we can see a list of statuses.
Here we can see a list of actions.
This dropdown allows us to display the number of devices on the current page i.e. the number of devices we want to see on a single page.
12. From this button, we can configure time.

2. Templates: Templates can be created for machines. Templates will apply the saved settings to machines. Templates will only overwrite the settings listed in the template; any setting not defined in the template will not be set.

Below points will explain the above screenshot.
Here we can see the title of the page.
From here we can search for templates by template name and tags.
From this button, we can search.
From this button, we can reset the filter.
Here we can see a list of the template name.
Here we can see a list of template descriptions.
Here we can see a list of tags.
Here we can see that the general setting is enabled or disabled.
Here we can see that the features setting is enabled or disabled.
Here we can see that the configuration setting is enabled or disabled.
Here we can see that the payment setting is enabled or disabled.
Here we can see that the log setting is enabled or disabled.
Here we can see that the display setting is enabled or disabled.
Here we have a list of actions. In this column, we have two action buttons.
edit: for editing any template.
delete: for deleting any template.
From this button, we can add a new template.
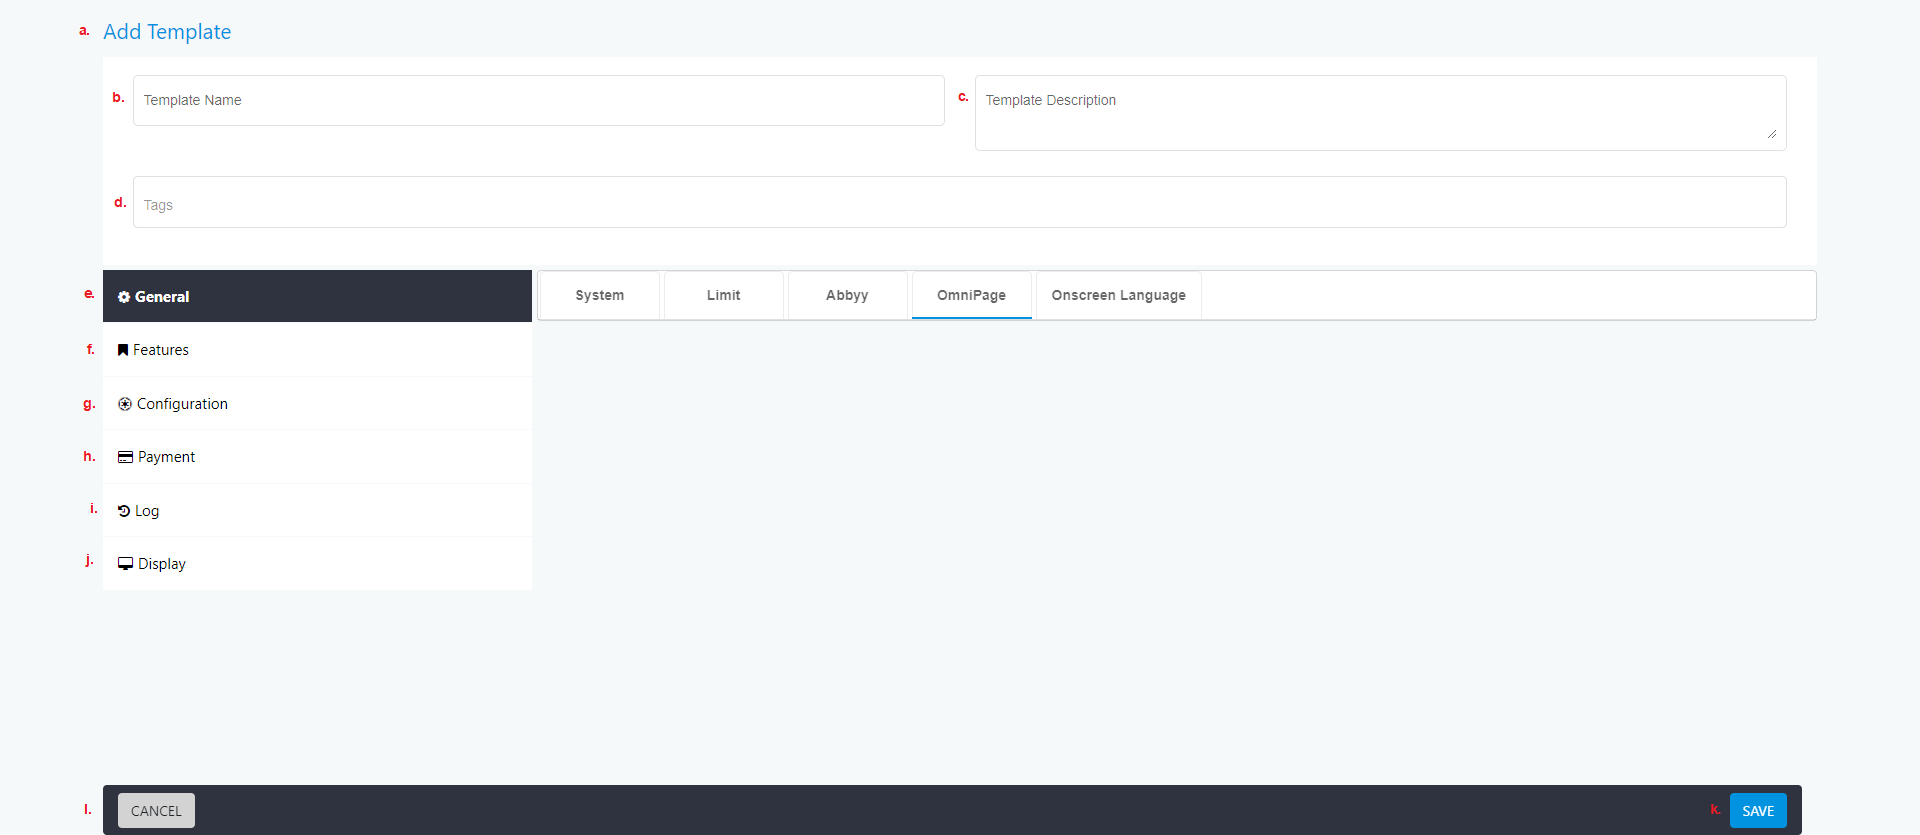
a. Here we see the title of the page i.e. “Add Template”.
b. Here we have to add the template name.
c. Here we have to add a template description.
d. Here we have to add a tag.
e. Here we have to configure general settings.
f. Here we have to configure features.
g. Here we have to configure configuration settings.
h. Here we have to configure payment settings.
i. Here we have to configure logs.
j. Here we have to configure Display settings.
k. From this button, we can save our new template.
l. From this button, we can cancel adding a new template and we will go back to the previous page.
16. From this button, we can copy any template which is already available in our list to a new template.
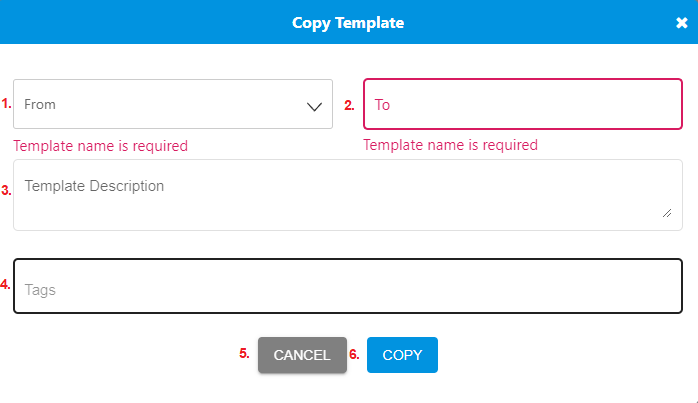
From this dropdown, we have to select any template for which we want to make a copy.
Here we have to add the name to the new template.
Here we have to add a template description for a new template.
Here we have to add the tags for the template.
From this button, we can cancel the copying template and we will go back to the previous page.
From this button, we can copy the selected template to a new template.
17. From this button, we can apply any template to new machines.

a. Here we can see the title of the page.
b. From this dropdown, we can select the template name.
c. From this dropdown, we can select customers.
d. From this dropdown, we can select locations.
e. From this dropdown, we can select areas.
f. From this switch, we can select apply now.
g. From this switch, we can schedule later.
h. From this button, we can cancel applying template and go back to the previous page.
i. From this button, we can apply the template.
3. Software update: Version updates can be pushed remotely through the portal.

a. We can see the title of the page.
b. From this dropdown, we can select the version.
c. From this dropdown, we can select the customer's name.
d. From this dropdown, we can select locations name.
e. From this dropdown, we can select areas.
f. Using this switch, we can select apply now.
g. Using this switch, we can select a schedule later.
h. Using this button, we can see all the details about the version.

Here we see the title.
From here we can search versions by version name and tags.
From this button, we can search.
From this button, we can reset the search.
Here we see the list of versions.
Here we see a list of descriptions of the versions.
Here we see a list of tags.
Here we see a list of compatible versions.
Here we see a list of actions.
From this button, we can add a new version.

Here we see the title of the page.
Here we can add the version name.
From this dropdown, we can select a compatible version.
Here we can add tags.
Here we can add a version description.
Here we can upload the version file.
From this button, we can cancel adding a new version and we will go back to the previous page.
From this button, we can add a new version.
i. From this button, we can cancel the software update and we will go back to the previous page.
j. From this button, we can apply the software updates.
4. License manager: We can apply for a license, schedule later, download the license, and save the license.
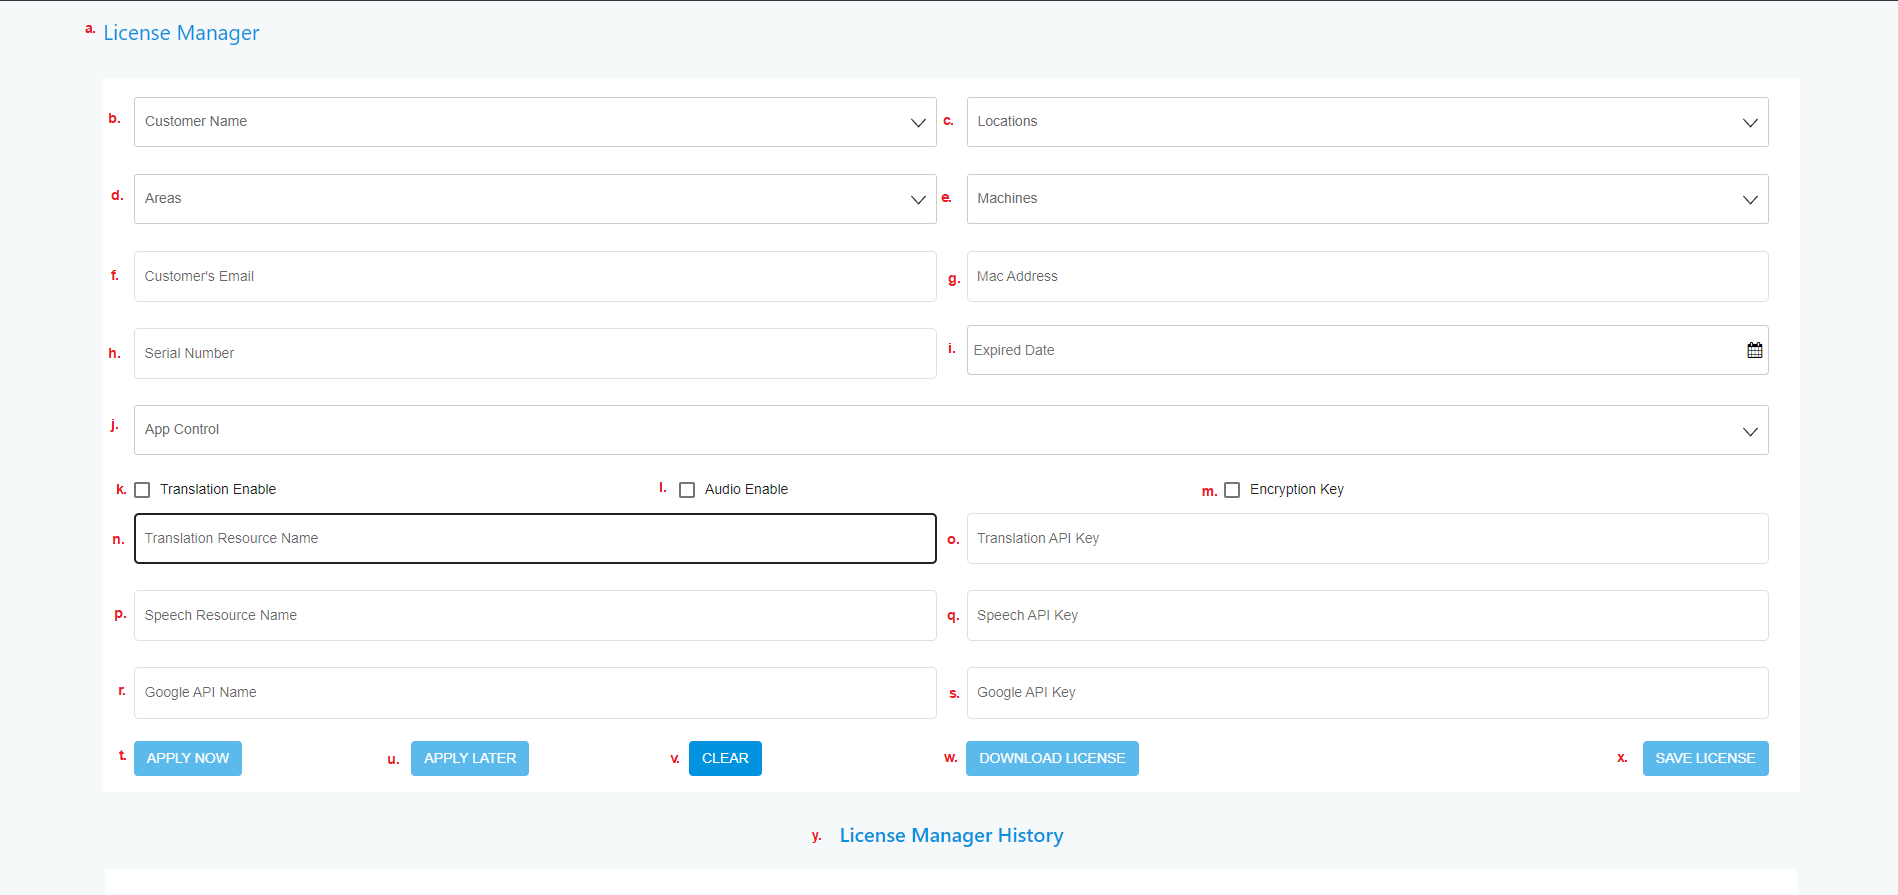
a. We can see the title of the page.
b. We can choose a customer name from this dropdown.
c. We can choose a location from this dropdown.
d. We can choose an area from this dropdown.
e. We can choose a machine from this dropdown.
f. We have to add the customer’s email address here.
g. We have to add the MAC address of the machine.
h. We have to add the serial number of the machine here.
i. We have to choose the expiry date of the license.
j. We have to choose app control from this dropdown.
k. From this checkbox, we can enable/disable translation.
l. From this checkbox, we can enable/disable audio.
m. From this checkbox, we can enable/disable the encryption key.
n. Here we have to add the translation resource name.
o. Here we have to add the translation API key.
p. Here we have to add the speech resource name.
q. Here we have to add the speech API key.
r. Here we have to add the google API name.
s. Here we have to add the google API key.
t. From this button, we can apply the setting now.
u. From this button, we can apply the setting later.
v. From this button, we can clear all the inputs.
w. We can download the license from this button.
x. We can save the license from this button.
y. We can see a list of license manager history.
5. Generate API keys: From here we can generate API keys.

a. Here is the title of the page.
b. We have to select a customer from this dropdown for generating API keys.
c. We can see a list of all the customers.
d. We can see only a list of active customers.
e. We can see only a list of inactive customers.
f. We can see a list of all customer names.
g. We can see a list of all the API keys.
h. We can see the list of statuses.
i. We can see all the actions in this column.
j. This dropdown allows us to display the number of devices on the current page i.e. the number of devices we want to see on a single page.

k. From this button, we can generate API keys.
