
ScanEZ Cloud Portal Users.
This section will discuss all the users, their roles, and permissions.
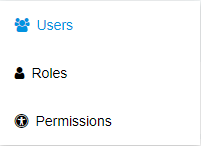
This section contains three subsections which are as follows-
Users.
Roles
Permissions.
Users: In this section, we will discuss how we can search for a user and add a user.

Below points will explain the above screenshot-
Here we can see the page title.
From this search bar, we can search by Username and First name.
From this button, we can search.
From this button, we can reset all the searches.
From this switch, we can see all the active and inactive users both.
From this switch, we can see only a list of active users.
From this switch, we can see only a list of inactive users.
Here we see a list of all usernames which is assigned to a user.
Here we see a list of all First names which is assigned to a user.
Here we see a list of all Last Names which is assigned to a user.
Here we see a list of all Emails which is assigned to a user.
Here we see a list of all Roles which is assigned to a user.
Here we see a list of all Customers which is assigned to a user.
Here we see a list of all Actions which is assigned to a user.
From this button, we can add a new user.
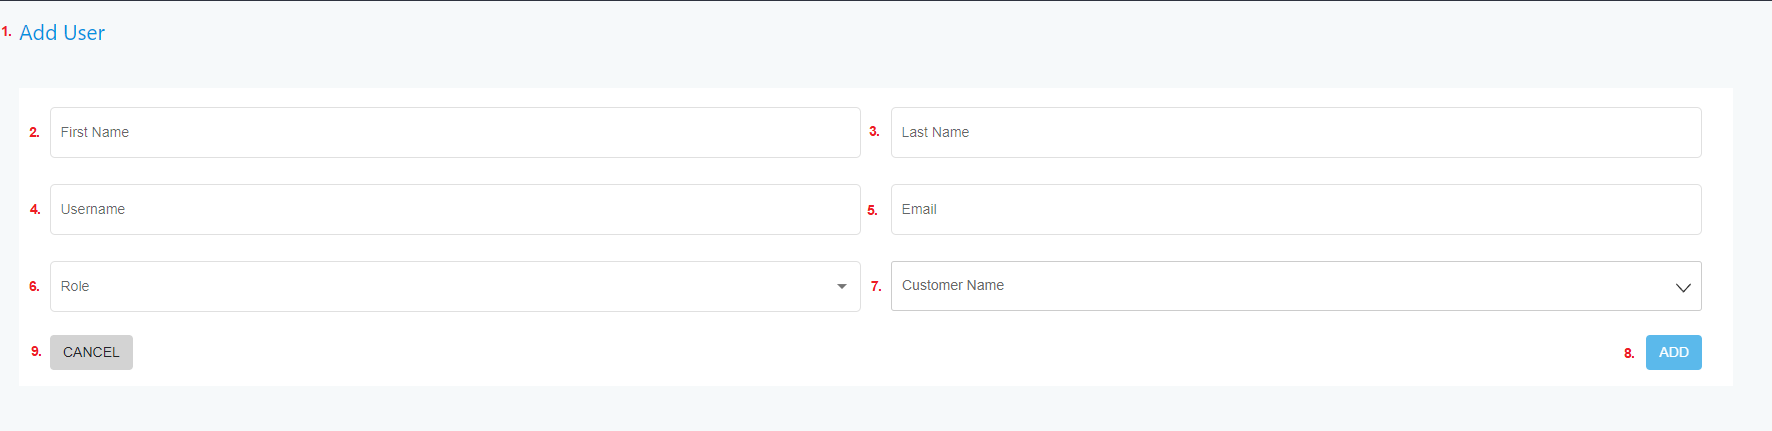
Here we can see the title of the page.
Here we have to add the first name of the user.
Here we have to add the last name of the user.
Here we have to add the username of the user.
Here we have to add the email of the user.
Here we have to assign roles to the new user.
Here we can choose the customer name.
From this button, we can add a new user.
From this button, we can cancel adding a new user and we will go back to the previous page.
2. Roles: Here we can add new roles and also we can edit older roles.
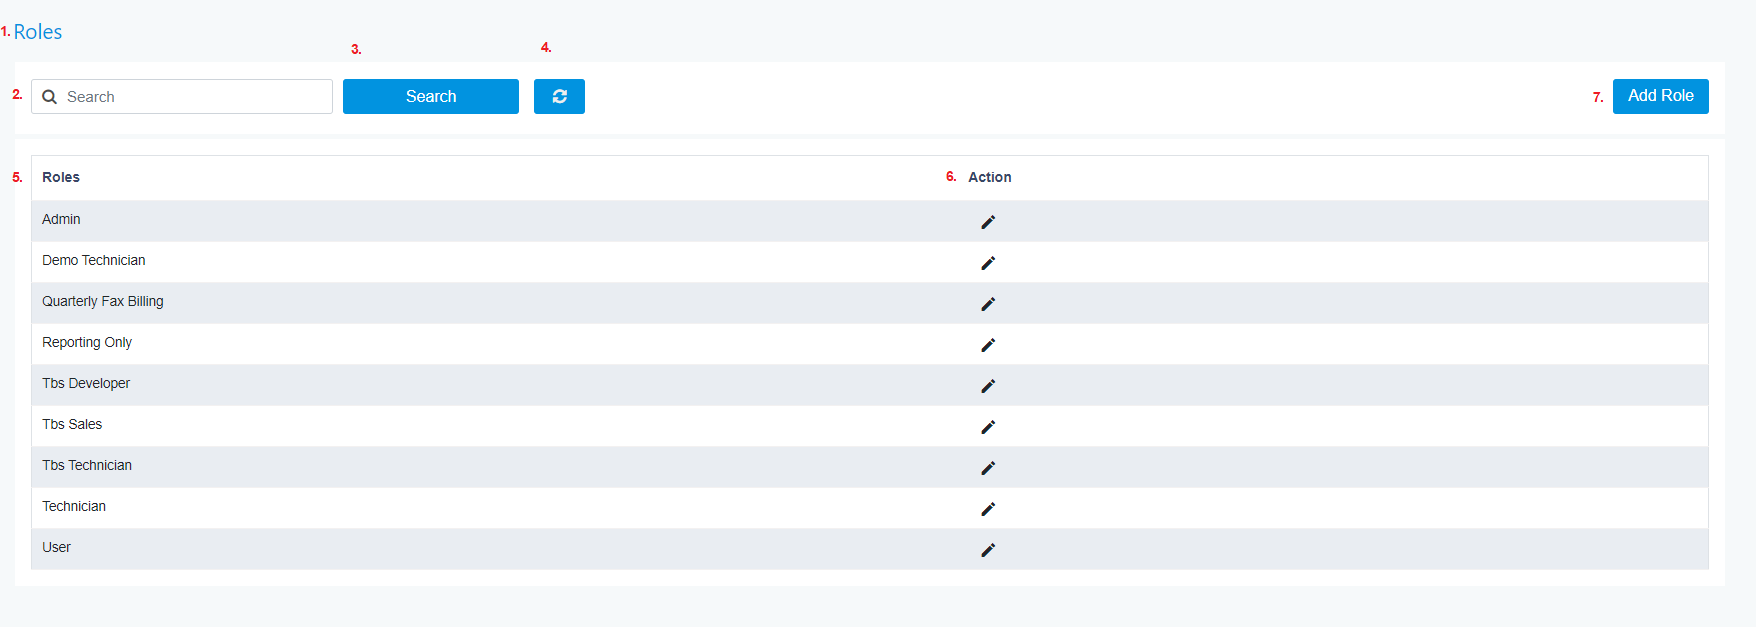
Here we can see the title of the page.
From this search bar, we can search for roles.
From this button, we can search.
From this button, we can reset all the searches.
Here we see the list of all the roles.
Here we can edit any role listed below.
From here we can add a new role.

Here we can see the title of the page.
Here we have to add the role name.
From this button, we can add a new role.
From this button, we can cancel adding a new role and we will go back to the previous page.
3. Permissions: In this section, we can give permissions to any role.
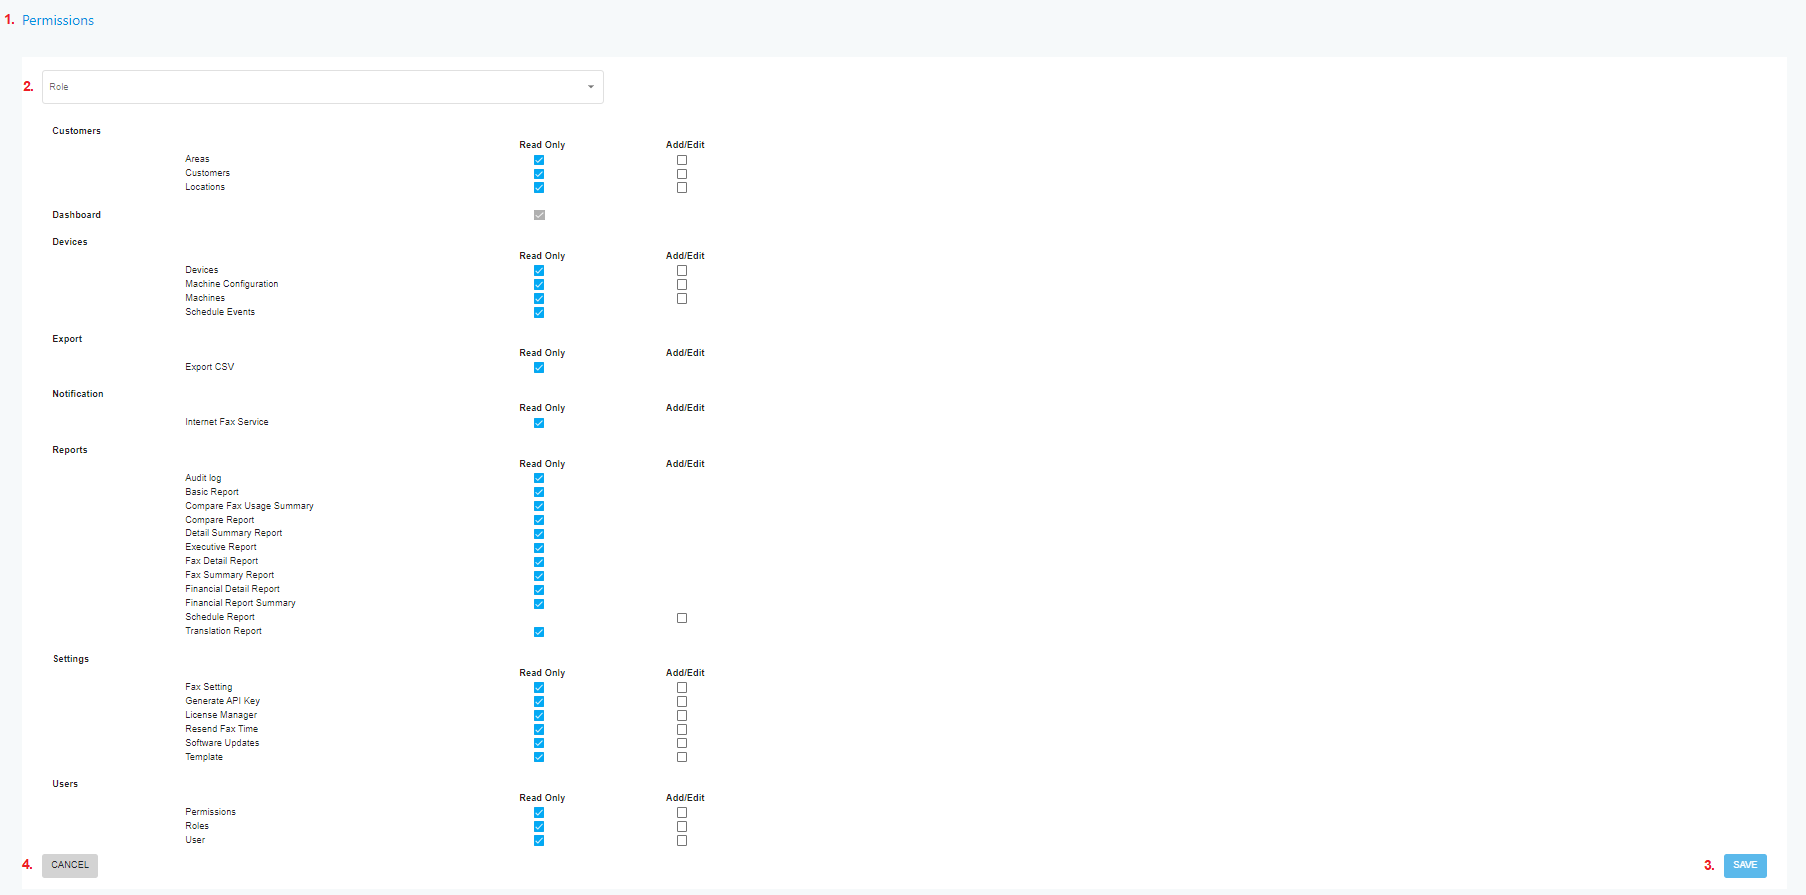
Here we can see the title of the page.
From this dropdown, we can select any role for whom we want to give permissions.
From this button, we can save our given permission.
From this button, we can cancel giving permissions and we will go back to previous page.